Follow me

Follow Me on Pinterest

Monday, January 21, 2013

Beef and Potato Empanadas

I made these for the first time last spring after craving Julia's Empanadas in D.C.  They are nowhere close to Julia's, but they're still delicious.  I think I will try making them with chorizo in the future to give them a taste closer to Julia's.  Anyway, this is an easy dinner and something different that your family is sure to love.


Ingredients:
  • 2 Peeled and chopped potatoes 
  • 1 Chopped onion
  • Olive oil
  • 1 lb ground beef
  • 10 oz can of tomato paste
  • Garlic to taste
  • 1/2 tsp chili powder
  • 1/4 tsp salt
  • Cumin to taste (I just lightly sprinkled it)
  • Shredded cheddar cheese or Mexican cheese
  • Pie crusts
  • 2 eggs
Step 1: Sauté the potatoes and onions in the olive oil until the potatoes are slightly tender, they'll cook up more in step 2.


Step 2: Add the ground beef and cook until browned.

Step 3: Add in the can of tomato paste and all of your spices.  Let it simmer for about 20 minutes. 


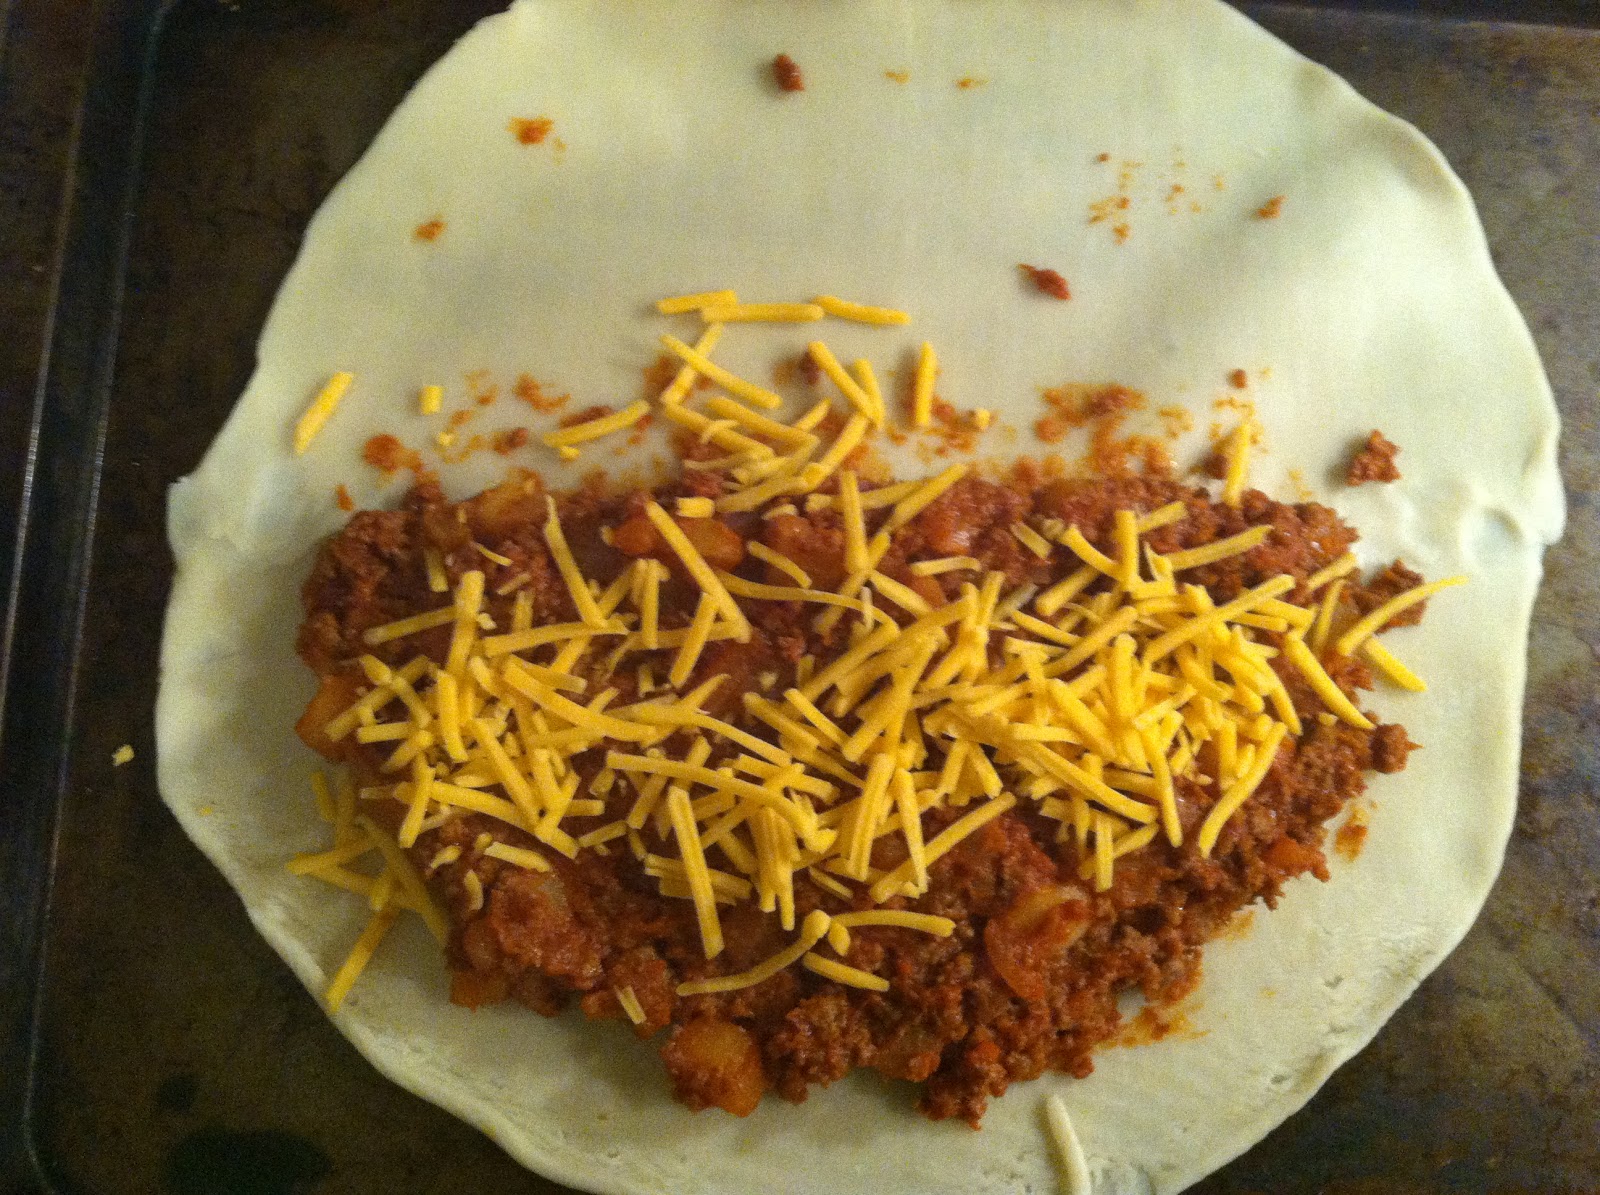
Step 4: Lay out your pie crusts on a cookie sheet and place the meat and cheese on it like shown below.  You can cut your pie crusts in half to make smaller empanadas, my fiancé just likes them macho sized!


Step 5: Use a fork to pinch the ends together.

Step 6: Beat the eggs together and paint them onto the pie crust.  This will give it a shiny, crusty finish.


Step 7: Bake at 400 for 20 minutes and enjoy!


Thursday, January 3, 2013

Chicken Delight Casserole

This is seriously one of the easiest and most delicious dinners ever.  I just found the recipe in November and have made it four times already!  I never have leftovers either!  My dad, who is the pickiest eater I have ever met, coined the term Chicken Delight.  Let me know if you like it.

Ingredients:

  • One rotisserie chicken
  • 1 box of Chicken flavored Rice A Roni
  • 1 container of French Fried Onions
  • 1 can of cream of mushroom soup
  • 1 container of sour cream (8 oz.)
  • 1 to 2 cans of string beans


The sour cream is not pictured here or the string beans...but I did remember the wine!

Directions:

Step 1: Cook the Rice A Roni according to the directions on the box.


Step 2: While the rice is simmering, pull apart the rotisserie chicken.


Step 3: Mix together the Rice A Roni, cream of mushroom soup, and sour cream.

Step 4: Mix in the chicken and lay it out in a sprayed baking dish.  I used a 13 x 9” baking dish, but the size doesn’t matter too much.  If you use a smaller dish, the casserole will just be thicker.

Step 5: Bake at 350 for 40 minutes.  Take out the casserole and add the container of French fried onions to the top and bake it for an additional 5 minutes.

My fiancé dug into this before I could get a completed picture!  Go figure!


I think next time I'm going to add the string beans into the casserole rather than having them as a side because we always mix them in with it anyway.  Give it a try!

Enjoy! 

Monday, December 3, 2012

Sew Fun: Pillows

My first pillow project was completed with the help of my mom a few weeks ago.  We had no pattern, only materials that my fiancé bought me for Christmas...last year.  The materials consisted of the pillow form, blue fabric, and a tea towel with the Maryland pattern on it.  My mom suggested the red trim.  So this is what we put together:


Then this weekend, I decided to try my own pillow, without any help.  I started this project without much confidence, so I did not take any pictures along the way.  I was so shocked to see how good it looked when I finished!  It's not perfect, but I don't think it's that bad for my second pillow.

I followed the directions on this blog, E Tells Tales, which I found using Pinterest.  It was very simple and despite my incorrect measurements and crooked lines, it still turned out!


Monday, November 26, 2012

Puppy Art: Thank You Cards!

This craft project comes from 8 months ago when my Golden was still just just a baby!  

Anyways...once we brought Rooney home, so many people stopped by to bring him toys, so we decided to thank them with homemade thank you cards.

First, I must say that I did a lot of online research to find out the safest type of paint to use.  I went with watercolors, which were made for kids and marked non-toxic.  

Next, I mixed together blue and green watercolors to get the color I wanted and then really diluted it with water.

Then, very carefully I put Rooney's paw into the watercolor and then stamped it a couple of times onto the paper.  You can see in the picture below that I also made a mat for a picture frame with his little puppy prints on it.

Lastly, I wiped off his little paws and washed them with lukewarm water until the water was clear.


Here is the final product!  He was so proud of his art work!  Everyone loved their thank you's and I loved making this little memory with my golden boy!


Sunday, November 25, 2012

Green Bay Gift Basket

I love my Ravens, but I grew up in a Green Bay lovin' house!  So, for my Dad's birthday (way back in August), I made him this gift basket that any dad would love!  PBRs, a gift card to buffalo wings, cheese, and crackers.  Then I made this little plaque to go with it!  Just some fun kitsch! 

The plaque is just a piece of wood that I painted using acrylic paints.  You can easily layout fonts on wood by printing them on paper and tracing over them with a pen or pencil.  The tracing leaves an unnoticeable mark in the wood that you can use to pretty much color in with paint.  I wish I had more pictures to be more detailed, but I don't.  I'll be doing a similar project in the future and will show you with pictures how to transfer images onto wood.


I'm Back

After a long hiatus....I am back!  I will be digging through some backlogged projects to upload some new things in the next few days!

Also, look forward to some new Christmas and wedding projects!

Saturday, July 7, 2012

Will you be my bridesmaid?


WILL YOU BE MY BRIDESMAID?

Being a bride is a big deal, so why shouldn't being a bridesmaid too!?  I wanted my girls to feel special, so I handmade a little something to go along with the question...will you be my bridesmaid?  I think they liked it!  Hopefully you do, too!

A bag for each bridesmaid....


Inside...a folder with all the info they need and more!


How to make the bag:

You will need:

  • A canvas bag
  • 12" paper doilies 
  • Fabric paint (I used navy blue)
  • Multi-purpose spray adhesive
  • Exacto Knife


Step 1:  Use the spray adhesive to temporarily glue your doily onto the canvas bag.  I forgot to take pictures during this process, but it's pretty simple.  I placed my doily in the lower right hand corner.  Once the doily is secured, use your fabric paint to paint between the wholes in the lace section of the doily.  Once finished paining, lift the doily off of the canvas.  If it rips, it's okay, just gently pull any remaining pieces off. 


Step 2: I went on my computer, found a font I liked and printed initials for each of my bridesmaids.  You can size it yourself.  After you print your letters, use an exacto knife to cut them out and create a stencil.  Again, use the spray adhesive to temporarily glue your stencil to the canvas bag. 


Step 3: Use the fabric paint to fill in your stencil and then gently lift it off of the canvas.  Once dry, your bag is done!  You can stop here...or add the folder too!


How to make the folder & its contents:


You will need:

  • A folder in your wedding color
  • Some scrapbook paper of your choice
  • Edge print die cut (your choice)
  • A printer
  • Paint swatches in your wedding colors
  • Glue
  • Paper clips
  • Blank Cards

Step 1: Print your initials and wedding date on scrapbook paper of your choice.  Use a edge print die cut to create a lace effect on the scrapbook paper and glue it to the front of your folder (I used the spray adhesive from the bags to ensure it stayed).


Step 2: Create the contents of your folder.  Pictured below is what I included in my folder, but  BE CREATIVE! Do what suits your bridal party!   

"your dresses"
Info about their dresses with paint swatches attatched

"your role"
A little write up about the role of the bridesmaids
"what we're working with"
I included funny pictures of all the groomsmen


 I included a personalized letter to each bridesmaid


Step 3: A large portion of my folder was the 'my girls' section.   I described each girl and wrote a 'most likely to...' for each bridesmaid.  I left out a picture for privacy.  


Step 4: Fill your folder with your creations.  I added a quote into the folder, "Friendship isn't a big thing...it's a million little things." -Anonymous 


Step 5: Put your folder in the canvas bag, make a cute little tag (I attached mine with twine) and present it to your bridesmaids.  I gave my girls their bags at my engagement party!